I’d guess most people have a love/hate relationship with notifications. Often an app will display too many notifications, either annoying users or causing them to miss important notifications (ALERT OVERLOAD). Sometimes apps will instead be cautious with their notifications and users will miss out on important events.
Either way, notifications are an essential part of a solid app experience. In particular, push notifications (ones initiated from a server) can be a perfect way to interact with your users. Here, I’m going to show you how to set up the server-side piece of push notifications for an Android app via Firebase.
Context
This blog is all about the backend implementation of push notifications for the Android Baseball League app. The ABL app is the second app in “Kotlin and Android Development featuring Jetpack”, my book all about building Android apps in 2021 and beyond.
If you want to understand the client-side (i.e. the Android app), check out the book (in particular, chapter 13). Oh, and if you’ve come here while reading the book, I hope you’re enjoying it! If you are, please go review it on Amazon. If not, then my apologies (also, skip the review).
Back to this blog; we will set up a new app in the Firebase Console, create a test notification from that console, then move to the ABL server to see how to send push notifications from your back-end. The server code here is Kotlin but the concepts apply across languages. Firebase even offers a REST API and SDKs in Node (JS), Python, C#, Go, and Java (though why not use Kotlin in that case?)
Also, while the focus here is push notifications to an Android app, the server-side concepts apply between platforms so you can always use this with your iOS app as well. With all that said, let’s get to work!
Configure Your App in Firebase
Head on over to the Firebase console and click “Create a project” (if you’re new to Firebase):
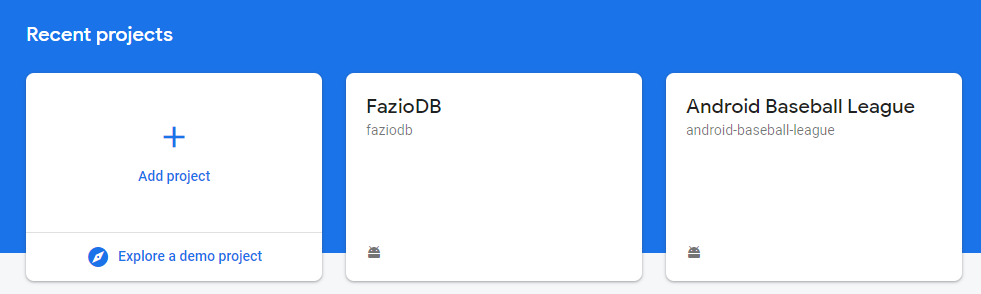
If you already have Firebase projects, you can either click “Add project” or select an existing project that should connect to your app:
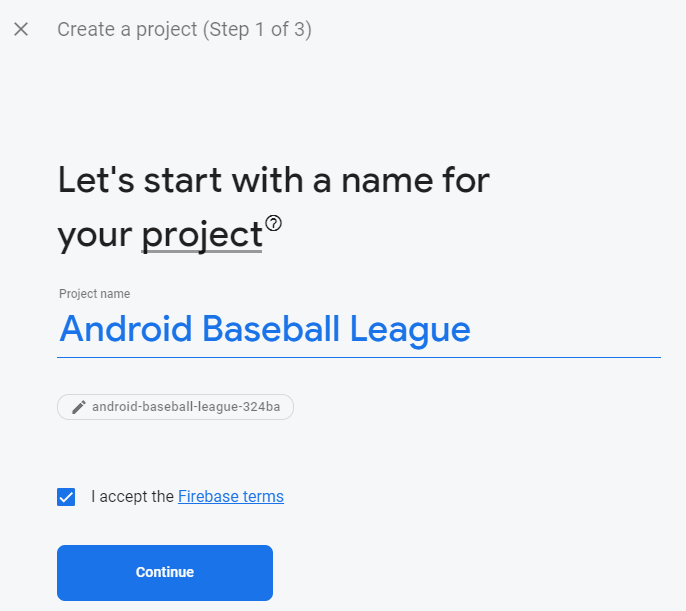
Give your project a name (I’m using Android Baseball League here) and click “Continue” (while also accepting the terms that I just know you’ll read fully):
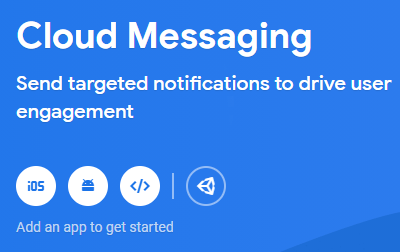
You can enable Google Analytics for the project if you wish, then Firebase will start building your project. Once that’s done, open the Engage section on the left side of the screen and choose “Cloud Messaging”:
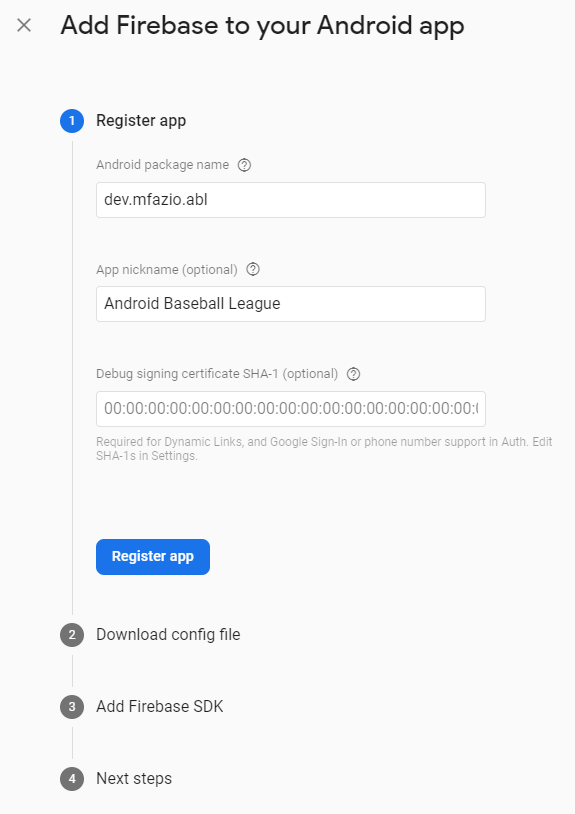
In here, you can click your app platform in the header to add it:
You will then head to the “Add Firebase to your Android App” (or whichever platform you choose) where you can register your app. Fill in the basic info for the app like this:
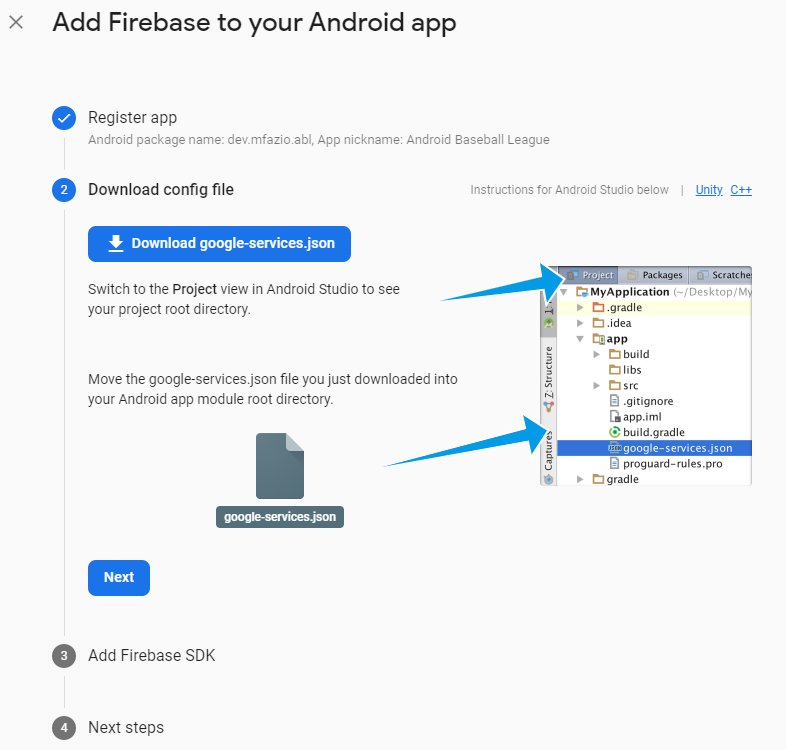
After clicking “Register app”, you can then download your google-services.json file which goes in your Android app:
You then get the instructions for adding the Firebase SDK to your app (which I cover in the book). After that’s done, continue back to the Firebase console and make sure you’re in the Cloud Messaging section. In here, we can make sure we properly configured our app.
Send Test Push Notifications
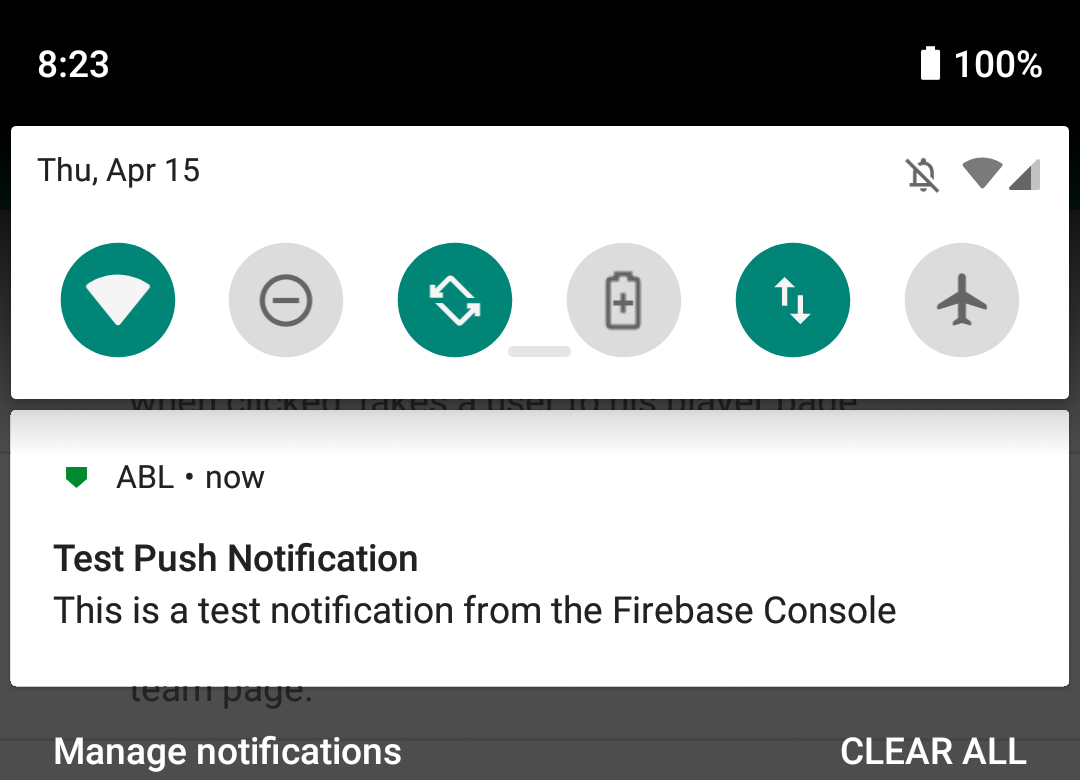
In the Cloud Messaging section, click the “Send your first message” button:
In here, we fill out a title and text for the notification (you can also add an image or name if you wish):
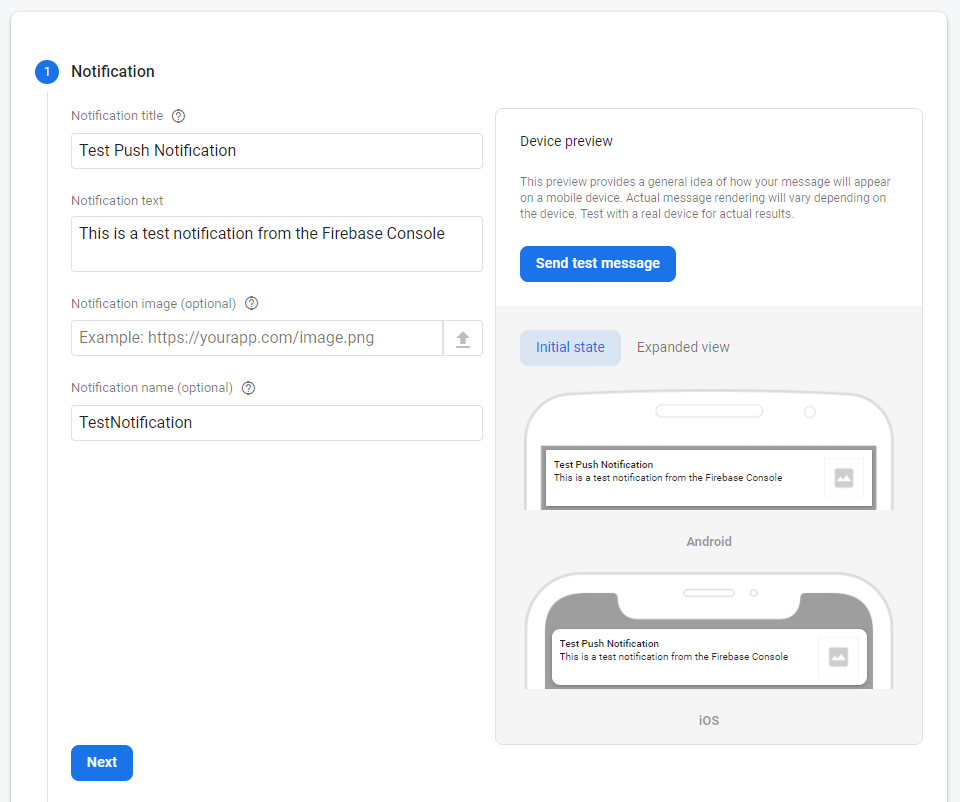
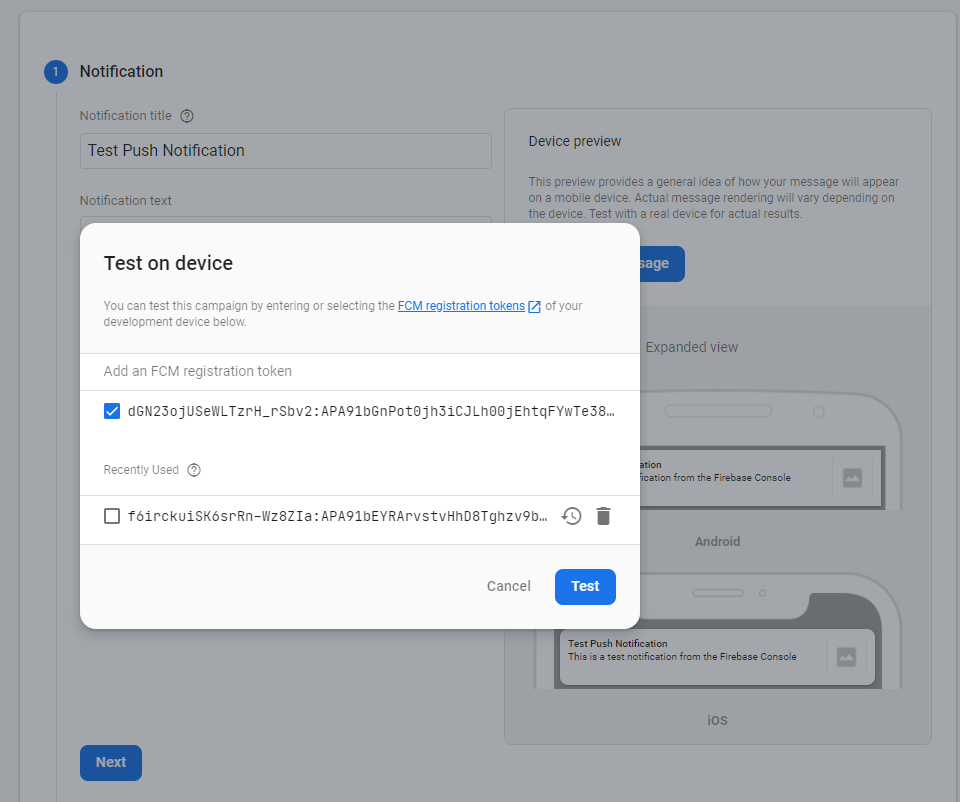
Then, we click the “Send test message” button which presents us with a “Test on device” window. Here, we need to enter our FCM registration token. You can get this from your app and the token.addOnCompleteListener() function, which would work something like this:
FirebaseMessaging.getInstance().token.addOnCompleteListener { task ->
    if (!task.isSuccessful) {
        Log.w(
            TAG,
            "Fetching FCM registration token failed.",
            task.exception
        )
        return@addOnCompleteListener
    }

    // `token` is the value you want here
    val token = task.result ?: "N/A"

    coroutineScope.launch {
        request(token)
    }
}
Enter that token into the field within the pop-up, then click “Test” to move on. Note this won’t actually send the notification yet to your device.
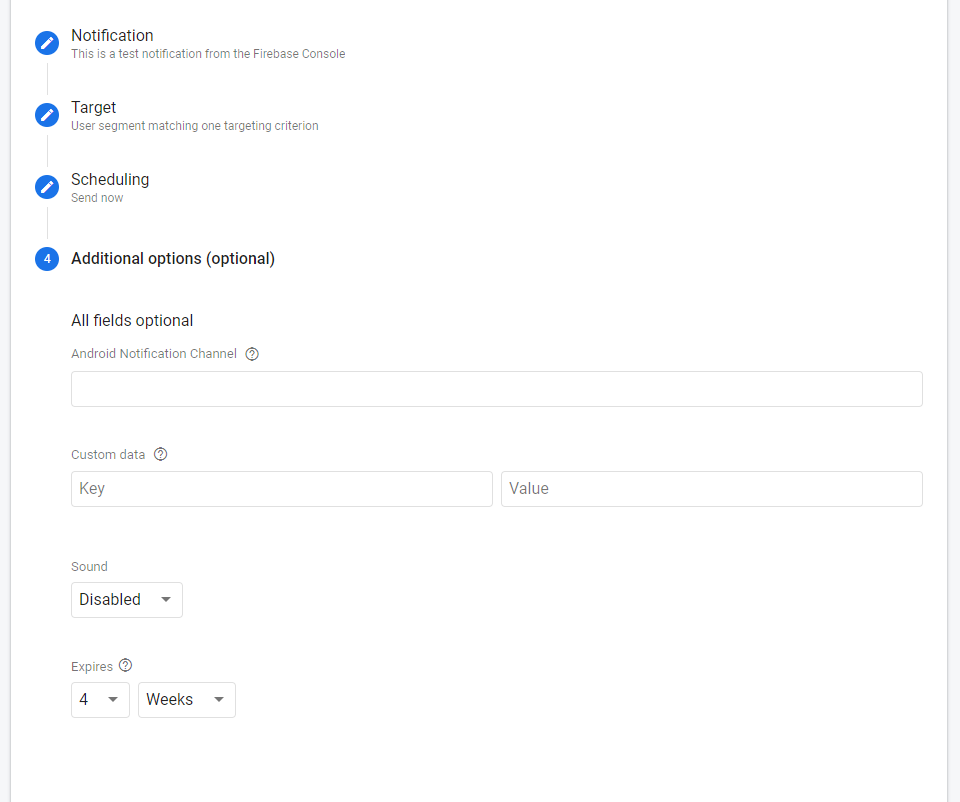
We have the ability to target a particular app and (if we enabled Google Analytics) target users based on criteria like app version, country, or other user properties. We want “Now” as our scheduled time, then see the extra message properties we can set. This includes notification channels (for Android, which are notification groupings), extra data, whether we want sound, and an expiration date in case someone doesn’t use the device for a while.
Make sure you put in a value for Android Notification Channel if you’re dealing with an Android device running Android 8.0 (Oreo) or later. If you skip that, your app won’t pick up the notification.
Once you have that all filled out, hit the “Review” button then the “Publish” button on the next pop-up. If everything’s set, you should see the notification come in on your device.
If your notification isn’t coming through, re-check all your configurations or take a look through the Firebase docs for setting up an Android client. Otherwise, it’s time to move onto the server side logic.
Send a Push Notification from a Server
With Firebase Cloud Messaging, we can send messages in a couple of ways. We are using the Firebase Admin SDK (the Java version, though all the code is Kotlin) but there’s also a REST API available in case you want to use an unsupported language or prefer calling a web service. The SDK uses the REST APIs in the background so you get the same functionality either way but the SDKs are more user-friendly.
Add the Firebase Admin SDK to Your Server
We add the SDK to our Kotlin project by including the firebase-admin dependency in our build.gradle or build.gradle.kts file:
// Groovy
dependencies {
    implementation "com.google.firebase:firebase-admin:$firebaseVersion"
}

// Kotlin
dependencies {
    implementation("com.google.firebase:firebase-admin:$firebaseVersion")
}
Note that $firebaseVersion is a variable set up in the Kotlin project. For the latest version, check out the release notes or a Maven/Gradle repository search like MVNRepository. The Firebase docs also have setup instructions for the other supported languages if you’re using those instead.
We also need to get a service account key file generated and added to our project. You can get this via the Service Accounts section of the Project Settings page, which you access via the “gear” icon in the top-left of the Firebase Console.
The “Service accounts” section gives you a bit of info about the Admin SDK as well as code snippets for adding the service account key file to your project. In here, click the “Generate new private key” button to create the file you need.
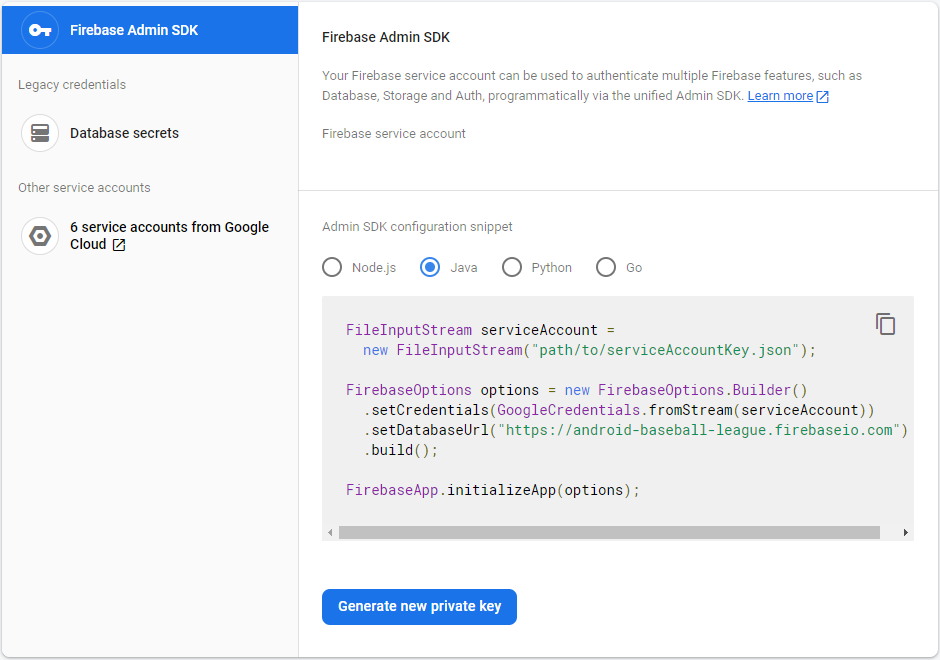
Once you have the service account key file, add it to your project as an accessible resource. In my case, it goes under the src/main/resources directory. With the dependency and service account key file added, we can get into the code and get everything configured.
Configure the Firebase Admin SDK
All interactions with Firebase happen inside a PushNotificationService object. In here, we need to grab the service account private key, use it as our Firebase credentials, and then initialize our app:
init {
    val serviceAccount =
        PushNotificationService::class.getResourceAsStream(
            // Make sure this parameter matches your filename.
            "android-baseball-league-firebase-adminsdk-nz9lb-a155eb867f.json"
        )

    val options = FirebaseOptions.builder()
        .setCredentials(GoogleCredentials.fromStream(serviceAccount))
        .build()

    FirebaseApp.initializeApp(options);
}
Thankfully, this is all we need to do in our server code to configure the Firebase Admin SDK, so we can move onto the API endpoint. For a bit of background, I set up web services using Ktor to support all my Android Baseball League APIs. I don’t want to go through how Ktor works here since that’s an entire blog unto itself, so just know that the main takeaway for this blog is that we have an API that we can call to send a push notification to the device.
In particular, we have an endpoint that can bring in four variables: notificationType, phoneToken, itemId, and dataOnly. The notificationType parameter is either “player” or “team” depending on if I want info about specific players or teams in the ABL. The phoneToken is that value we pulled out of our app when sending the test notification. itemId is the identifier for either the player or team that I want to reference. I used a generic name here so that the same parameter works for both request types.
Now, dataOnly is requires a bit more explanation. This flag determines if we include an AndroidConfig section to our request, which allows us to include info about an AndroidNotification object. That object (and a data request in general) gives us the ability to configure the notification displayed to a user from the server rather than leaving it up to the app. Note that the app needs to handle notification messages in the app if it’s in the foreground, no matter the type. Since the platform-specific settings are not the focus of this blog, I’m going to move along, but for more info you can see more in the Android docs for Cloud Messaging.
Send a Push Notification via Firebase
The PushNotificationService object contains two public functions: sendPlayerPushNotification(...) and sendTeamPushNotification(...). These functions are effectively doing the same thing so we can focus on the latter function and still get the idea of what’s happening. sendTeamPushNotification(...) brings in teamId, phoneToken, and dataOnly parameters, which we covered in the last section. We use the teamId to grab the Team object out of a DataService then call a generic sendPushNotification(...) function to make the call.
sendPushNotification(...) brings in the phoneToken we sent in, along with a title and body. We also include the Android notification channel ID (channelId), the teamId, a Map of any data we want, and the dataOnly flag we covered earlier. The entire sendTeamPushNotification(...) function looks like this:
fun sendTeamPushNotification(
    teamId: String, phoneToken: String, dataOnly: Boolean = false
) {
    val team = DataService.teams.firstOrNull {
        it.teamId.equals(teamId, ignoreCase = true)
    } ?: return

    sendPushNotification(
        phoneToken,
        "Here come the ${team.name}",
        "This is a push notification from the ABL server for the ${team.name}.",
        "ablNotificationsTeams",
        teamId,
        mapOf(
            "destination" to "team",
            "teamId" to teamId,
            "teamName" to team.name
        ),
        dataOnly
    )
}
The sendPlayerPushNotification(...) function is similar in that it gets the player based on the playerId we send in, then calls sendPushNotification(...) as well. This way we have the actual push notification logic in one spot and each incoming path focuses on the needed configuration.
sendPushNotification(...) takes in lots of parameters but the logic thankfully isn’t too complicated. We use the Firebase Cloud Messaging Message.Builder object to build our push notification request then send it to the server. From there, Firebase will send it to the device(s) that we specified in the request. Let’s take a look at the code first, then we can go through each piece:
private fun sendPushNotification(
    phoneToken: String,
    title: String,
    body: String,
    channelId: String,
    teamId: String,
    data: Map<String, String>,
    dataOnly: Boolean = false
) {
    val message = Message.builder()
        .setAndroidConfig(
            if (dataOnly) null else
                AndroidConfig.builder().setNotification(
                    AndroidNotification.builder()
                        .setChannelId(channelId)
                        .setTitle(title)
                        .setBody(body)
                        .setIcon(teamToLogoIdMap[teamId.toUpperCase()])
                        .build()
                ).build()
        )
        .putAllData(data)
        .setToken(phoneToken)
        .build()

    val response = FirebaseMessaging.getInstance().send(message)
}
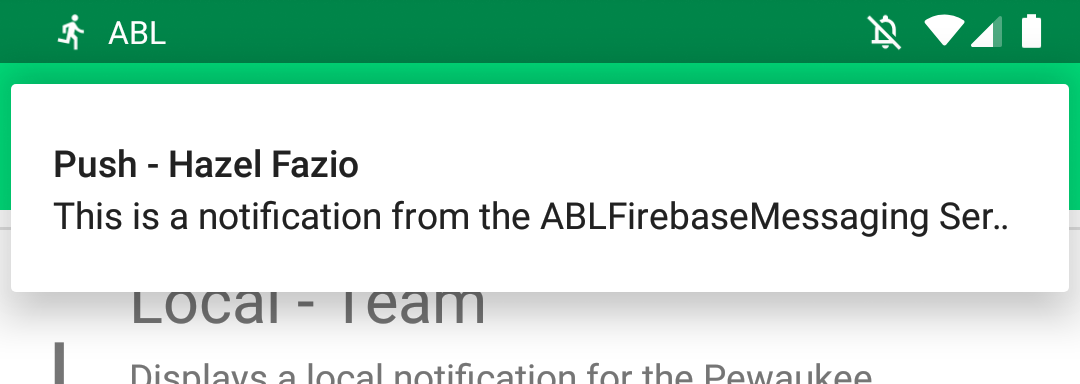
For reference, calling sendTeamPushNotification(...) (which then calls sendPushNotification(...)) will give us a notification that looks like this:
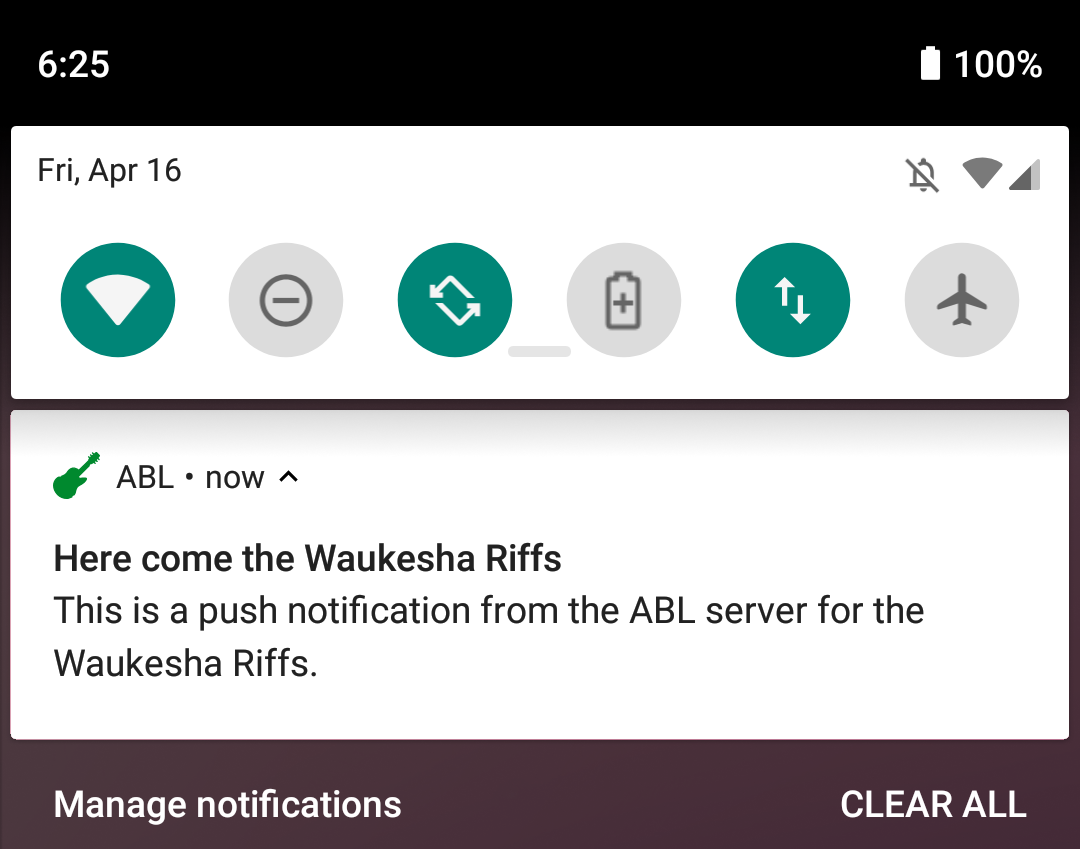
Back to the code, we can start with the easier parts: putAllData(...) and setToken(...) pass along the parameters that came into the function. In the case of putAllData(...), those values come with the push notification to give the app extra information about the notification. With a Team notification, we send the team’s ID and Name along with a destination. The app takes that parameter and sends the user to a new screen, in this case, the Team page for the given team.
The setAndroidConfig(...) function (assuming dataOnly is false) tells a user’s device how to display a notification rather than relying on their installed app. The title and body values are the bold text and main text of the notification, respectively. You can see each of those in the screenshot from earlier.
The setIcon(...) function takes in a string ID that corresponds to the filename in the Android app. This means we need to know the names of those drawable files on the app side to display the notification as we want, so make sure those are in sync. In this case, we display the team’s logo to give the notification a bit more of a personalized feel. If we exclude this parameter, the app’s icon is instead used.
We discussed the concept of Android Notification channels briefly when sending our test notification and setChannelId(...) is another reference to that same idea. We can group together notifications to allow users to customize how frequently and aggressively they’re notified about a particular subject in our app.
Once the Message is fully built out, we use the FirebaseMessaging class to send(...) the Cloud Message to the device(s). The response we get back is a String response so we could log that result or even send it back from the API if we wish. But with that, we’re now able to send our messages to users and our API is ready to go.
Summary
We now have a finished push notification API which can display info to a user about a team or a specific player. We control how that notification displays on the device and even how the Android OS groups the notification. And, best of all, Firebase handles most of the heavy lifting for us as long as we configure everything correctly.
There’s more functionality available with Firebase Cloud Messaging, so I recommend checking out the docs after you’re done here to see what else you can do. And above all else, remember to not annoy your users with notifications!